 Table of ContentsFrequently Asked Questions
Please check first whether your connection parameters are correct and the database server is available. You may also want to check the compatibility notes, as these contain guides and solutions to known problems with some DBMS.
If the connection parameters are correct and there is no problem with the database driver or a version conflict, you may circumvent the problem by trying a manual installation. To do so, read the chapter trouble shooting.
Administrators do as follows to set a new password:
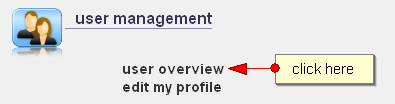
Figure: menu "user overview"
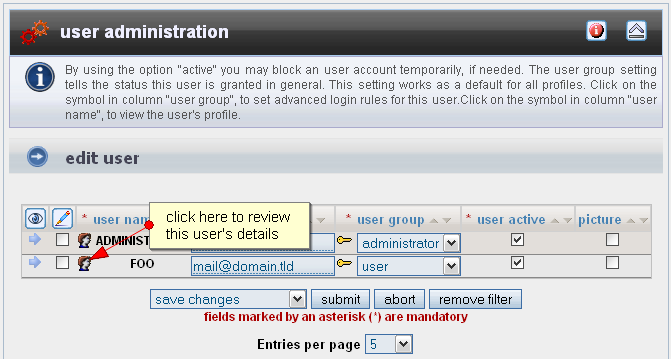
Figure: list of all users

Figure: generate new password
If you have forgotten your own password, please contact another administrator. If you ARE the ONLY administrator, then no new password can be generated. However it is also possible to reset the old password manually.
If the installation works with text files, please connect via FTP to your account, and download the file "config/db/user/user.sml". Edit this file and replace the password with the text "UNINITIALIZED". Upload the file again, and set the access rights via CHMOD to 777.
If the installation works with a database, open a connection to the database by using an appropriate program (for example PHPmyAdmin for MySQL) and edit the table "user" and set password of user "Administrator" to "UNINITIALIZED".
Alternatively, you can simply execute the following SQL statement.
UPDATE `user` SET user_pwd = 'UNINITIALIZED' WHERE user_id = 'ADMINISTRATOR';
(please adapt the quoting for the corresponding DBMS)
Remember to set a new password afterwards.
 Note: This script never stores the password as real text Instead it is encrypted after input. This is an one-way encryption which cannot be reversed. For this reason, it is not possible to retrieve a forgotten password on demand - instead it is always required to create a new one.
Choose the smilies you want to insert. Please note that these graphics are to be stored in GIF format.
Copy the files to the directory " common_files/smilies " of the framework.
If you want to use smilies from a directory other than the prescribed, then proceed as follows.
If you have multiple profiles, you may need to copy the settings for all other profiles as well.
Refer to the section " Installation for Beginners ". Since version 2.2 the program has a self-diagnosis mode. If you have finished the installation as described in the manual, you can use it to verify that all files are installed correctly.
For the self-diagnosis to start, open the URL "index.php?action=test" in your browser program. The program will then begin to create a diagnostic protocol. The self-diagnosis tests important directories and files and reports errors. These are shown as red lines in the protocol. If an error is found, read the error message and follow the instructions.
The self-diagnosis finds some of the most typical installation errors, but may not discover all kinds of possible problems. If you have installed the program according to instructions and still encounter problems during operation, send an email to![]() . Don't forget to add the URL and a description of your problem. This offer is available to registered users free of charge.
. Don't forget to add the URL and a description of your problem. This offer is available to registered users free of charge.
The database setup offers an option labeled "prefix for database" (see figure ). This option is EXPERIMENTAL and serves the only purpose, of running two installations of the YANA Framework on the same server and the same database without having them affect each other. In any situation where this is not needed it is strongly recommend that this option is NOT used, due to it's experimental status.

Figure: experimental option to set a prefix on a database connection
A typical application for this option would be if someone is switching from an older to a new version, and therefore wants to temporarily run tow installations for testing purposes, to test the new version in a real environment before making a permanent change.
If you use a prefix, this also means that the SQL installation files in the directory "config/db/.install" need to be corrected by hand, according to the new table names including the chosen prefix. Only then the database may be installed as usual. The is currently no automatic process available to apply these changes. The PHP source code, however, does not need to be changed.
If you use your own plug-ins with handwritten SQL statements, you must of course also change the source code there to use the reflect names of the tables. Should you, however, use the database API of the framework, and have your SQL statements generated automatically, then editing these files is not necessary. The framework will correct your SQL at runtime automatically.
You should schedule 5 to 15 minutes for the conversion of the SQL installation files.
If this option is used accidentally and you experience problems accessing your data, then you can may reset this option manually. To do this edit the file "config/dbconfig.php" and change the entry at line 9 to: define('YANA_DATABASE_PREFIX',"");
Note: in some versions of the application, this feature is intentionally disabled.
If you don't want to use the site map as the front page for the application, it is possible to replace it with a different page - for example, the start page of a plug-in of your choice.
To do this open the file "config/system.config" in any text editor of your choice and change the entry "DEFAULT.HOMEPAGE" as you see fit (see figure).

Figure: Changing the front page (default homepage)
The following is a list of suggestions of possible settings:
It is not allowed to insert HTML codes via a publicly available form. The risk that a person abuses this offer to insert unwanted content or manipulate the website in an unacceptable way would be too large Among other things, a malicious attacker could, for example insert scripts, which, for example, might be used to commence a "phishing attack" to view visitors a different site content in order to steal passwords of users.
Basically to ban HTML completely is also not useful, because some elements are totally harmless and the readability of text may benefit from their use. This requires a compromise.
This program works, as just described, as well as most other programs on the WWW with a "Whitelist". That is, some harmless tags are allowed. All other tags are not allowed and will be automatically removed.
For example: [b]this is bold text[/b] This code is easily controllable and may be converted to clean HTML later: <b>this is bold text</b> An abuse is no longer possible..
As a side effect, these simple tags are much easier to understand than pure HTML. This makes it easier for beginners to write new entries.
| Icon | Tags | Description | Example | Output |
|---|---|---|---|---|
![[b]](data/bold.gif) |
[b] | bold text format | [b]bold text[/b] | bold text |
![[i]](data/italic.gif) |
[i] | italic text format | [i]italic text[/i] | italic text |
![[u]](data/underline.gif) |
[u] | underline text | [u]underline text[/u] | underline text |
![[code]](data/code.gif) |
[code] | insert source code (code is not executed, but formatted as text) |
[code]Text[/code] | Text
|
![[php]](data/emb_php.gif) |
[php] | insert PHP code (code is not executed, but formatted as text) |
[php]print 'Hello World';[/php] |
|
![[color]](data/color.gif
) |
[color] | set a text color | [color=red]Text[/color] | Text |
![[mark]](data/mark.gif
) |
[mark] | set background color | [mark=yellow]Text[/mark] | Text |
![[url]](data/url.gif) |
[url] | inset hyperlink | [url]www.yanaframework.net[/url] | www.yanaframework.net |
![[mail]](data/mailto.gif) |
[mail] | insert mail address | [mail]mail@domain.tld[/mail] | mail@domain.tld |
![[img]](data/image.gif) |
[img] | insert graphic * | [img]domain.tld/img/image.gif[/img] | |
![[emp]](data/emphasize.gif) |
[emp] | emphasize text | [emp]Text[/emp] | Text |
![[header]](data/header.gif) |
[h] | insert header | [h]header[/h] |
header
|
![[small]](data/emb_small.gif) |
[small] | reduce font size | [small]small text[/small] | small text |
![[big]](data/emb_big.gif) |
[big] | increase font size | [big]big text[/big] | big text |
![[c]](data/emb_c.gif) |
[c] | insert comment (e.g. for writing signatures) |
[c]comment[/c] |
comment
|
![[hide]](data/emb_hide.gif) |
[hide] | hide a text, till the users moves the mouse over it | [hide]this is a secret[/hide] |
this is a secret
|
![[wbr]](data/emb_wbr.gif) |
[wbr] | allow line break within a word | ship[wbr]yard-[wbr]employee | shipyard- employee |
![[br]](data/emb_br.gif) |
[br] | force line break | ship-[br]yard-[br]employee | ship- yard- employee |
* YANA prevents attacks on your site through cross-site scripting (XSS), because it only the inclusion of graphics from the local server within the directory of the framework is permitted. The file must also have the file extensions "jpeg", "jpg, png", or "gif". Special characters are not allowed, which will prevent an attacker to conceal the true URL of a file by the skillful use of escape sequences, to try to sneak by the protection of the framework.
The tag [img] is useful for community sites, where users can upload their own graphics files on the server.
 Warning: Incorrect settings may by chance prevent the program from running properly. Therefore never perform such changes in a productive environment. Instead check your settings first in a test environment.
It is possible to set up individual tags for each website profile. Proceed as follows.
<PROFILE>
...
<EMBTAG>
<tagname>
<TITLE>value of attribute "title"</TITLE>
<TEXT>label</TEXT>
<IMAGE>image of the button, that inserts the tag/IMAGE>
<1>optional regular expression to transform to HTML</1>
(default value = /\[$tagname\](.*)(?:\[\/$tagname\]|$)/Us)
<2>optional replacement string to convert to HTML</2>
(default = <span class="embtag_tag_{tagname}">$1</span>)
</tagname>
</EMBTAG>
</PROFILE>
<PROFILE>
...
<EMBTAG>
<bold>
<TITLE>insert bold text</TITLE>
<TEXT>bold text</TEXT>
<IMAGE>%SKINDIR%/default/styles/tags/b.gif</IMAGE>
<1>/\[bold\](.*)\[\/bold\]/Us</1>
<2><b>$1</b></2>
</bold>
</EMBTAG>
</PROFILE>
Note: If you remove a tag, it is no longer viewed as HTML as well. This includes such data, that has had this tag earlier. Also be sure not to remove or replace the original tags.
Take your question to the internet forum at yanaframework.net/forum. This offer is free of charge. Please understand, that there is no guarantee that unsolicited e-mail is handled. Please respect, that requests by known donators, who engage in the further development of this project, may be answered faster than normal mail.
 Thomas Meyer, www.yanaframework.net
 Advanced User's Guide:
