 Table of ContentsDeveloper's Manual
The following section will show you how to edit the PHP source code of a plug-in to add new, or modify existing functions.
In this section of the tutorial you will learn how to implement an automatically generated RSS feed for the 10 latest items in the blog. The tutorial takes you through the various stages of the creation.
Before you edit the PHP source code, you should register the new action in the interface of the plug-in. Only then it can be called in your web browser. On the one hand this serves performance and on the other hand it adds an additional safety restriction, in order to make it more difficult to smuggle foreign PHP code into your application to prevent and thus improve the security for all plug-ins.
In order to accomplish this step, open the file "plugins/blog.config" in PSPad (note that you should replace the name "blog" with the name of your plug-in). Select the highlighter "Yana Framework"
Add a new action to the container "INTERFACE" (Shortcut "act"). Name this action "blog_rss".
The source code should now contain the following new action:
<INTERFACE>
[...]
	<BLOG_RSS>
		<TYPE>default</TYPE>
		<MODE>0</MODE>
		<PERMISSION>0</PERMISSION>
		<TEMPLATE>INDEX</TEMPLATE>
		<INSERT></INSERT>
		<ONSUCCESS>
			<TEXT>200</TEXT>
			<GOTO></GOTO>
		</ONSUCCESS>
		<ONERROR>
			<TEMPLATE>ALERT</TEMPLATE>
			<TEXT>500</TEXT>
			<GOTO></GOTO>
		</ONERROR>
	</BLOG_RSS>
[...]
</INTERFACE>
Not all of the automatically generated fields are required. Adjust the definition of the action as follows:
<INTERFACE>
[...]
	<BLOG_RSS>
		<TYPE>read</TYPE>
		<MODE>0</MODE>
		<TEMPLATE>NULL</TEMPLATE>
		<PERMISSION>0</PERMISSION>
	</BLOG_RSS>
[...]
</INTERFACE>
The field "TYPE" with the value "read" tells you something about the intended behavior of this action. This type expresses that this action only requires read access to the database. This information may help to improve performance.
The field "MODE" with a value of "0" indicates that the standard operation mode is used. (The value "1" will make the program start in "safe mode" for this action).
The field "PERMISSION" with a value of "0" indicates that every visitor is allowed to access this action, without needing some higher security level.
The field "TEMPLATE" indicates, which template is to be selected for the action. While it is possible to change the template inside the PHP code, using this field in the configuration file is easier and supports readability.
The selected template "NULL" is a predefined special value. It expresses that "no template" is to be selected This is not necessary, because the output is created by an automatic RSS generator, with no need for a template.
This completes the preparations. The following section will look at the implementation in the PHP source code.
Open the file "plugins/blog/plugin.php" in PSPad (note that you should replace the name "blog" with the name of your plug-in). Select the highlighter "PHP".
To the class "plugin_blog" add a new function with the name "blog_rss". You can copy the following template to do so.
<?php
class plugin_blog extends plugin
{
// [...]
    /**
     * blog_rss
     *
     * returns bool(true) on success and bool(false) on error
     *
     * Type:        read
     * Permission:  0
     * Templates:   NULL
     *
     * @access  public
     * @return  bool
     * @name    plugin_blog::blog_rss()
     * @param   array  $ARGS  array of params passed to the function
     */
    function blog_rss ($ARGS)
    {

    }
// [...]
}
?>
Make it a habit to always immediately document any new function you write, while the idea and details are still fresh in your memory. This has the advantage, that you have to review your code, which helps you to identify possible problems very soon.
In order to provide a RSS feed of the 10 most current contributions, you need to load them from the database. Therefor you have to query the table "blog". By setting the limit-clause to "10" you limit the maximum number of rows in the result set to 10. To ensure these are the latest entries you have to sort them by the date of creation in descending order. This means, sort them by the column "blog_created". To do so, use "order_by" and "desc".
The following source code demonstrates this:
<?php
/* get entries from database */
$query = array(
    'key' => 'blog.*',
    'order_by' => 'blog_created',
    'desc' => true,
    'limit' => 10
);
$rows = $this->database->get($query);
?>
As you can see in this example, the Yana Framework has a query generator for producing simple SQL statements. So you don't need any SQL knowledge to be able to query the database with the Yana Framework The framework also takes care of mapping the real SQL statements to the syntax of your DBMS.
The Query Generator also does simple automated safety checks, does automatic quoting of input values and does plausibility checks on SQL queries, before they are ever send to the database. This reduces the risk of SQL-injections and thus increases the security of your application.
The result set, here $rows, consists of a multidimensional, associative array. Each entry corresponds to a row. Each row has one item per column.
A call to var_export($rows) demonstrates this. This output is as follows:
<?php
array (
  2 =>
  array (
    'BLOG_TITLE' => 'Test',
    'BLOG_TEXT' => 'This is a test[br]This is a test[br]This is a test[br]This is a test',
    'BLOG_AUTHOR' => 'Thomas Meyer',
    'BLOG_CREATED' => '1173276511',
    'PROFILE_ID' => 'default',
    'BLOG_ID' => 2,
  ),
  1 =>
  array (
    'BLOG_TITLE' => 'Test',
    'BLOG_TEXT' => 'This is a test[br]Just another test.[br][br]New line.',
    'BLOG_AUTHOR' => 'Thomas Meyer',
    'BLOG_CREATED' => '1173276442',
    'PROFILE_ID' => 'default',
    'BLOG_ID' => 1,
  ),
)
?>
You can tell by the index of the array, that the entries are sorted in reverse order. The column names are written in capital letters.
For further details and code examples see the developer's cookbook, chapter databases and the API documentation of the class "DbStream".
To create RSS feeds you may use the class "RSS". In order to produce a new feed, an instance of this class should be produced in the next step.
<?php
$rss = new RSS();
$rss->title = 'Blog';
$rss->description = 'the 10 most recent blog entries';
?>
Title and description of the RSS feed can be chosen freely. To do so use the properties "title" and "description", as in the following example.
Subsequently, an entry in the RSS feed is to be provided for each entry of the database. An entry is represented by the class "RSSitem". In order to produce an entry, a new instance of this class is produced and added to the RSS feed by using the function RSS::addItem(). The entries are stored in the RSS feed in the order in which they are inserted - regardless of the date, as date is an optional field.
The following source code demonstrates how to create new entries.
<?php
foreach ($rows as $row)
{
    $item = new RSSitem();
    // Title
    $item->title = $row['BLOG_TITLE'];
    // Link
    $action = 'blog_read_read_blog';
    $blog_id = $row['BLOG_ID'];
    $link = DisplayUtility::url("action=$action&blog_id=$blog_id", true);
    $link = str_replace(session_name() . '=' . session_id(), '', $link);
    $item->link = $link;
    // Text
    $item->description = $row['BLOG_TEXT'];
    // Date
    $item->pubDate = date('r', $row['BLOG_CREATED']);
    // add item
    $rss->addItem($item);
} /* end foreach */
?>
Take a closer look at the code that creates the link. It refers to the action, which is used to output the blog. This action is "blog_read_read_blog". As already mentioned, this name is generated automatically. The function "url()" as member of the utility class "DisplayUtility" creates, as the implies, an URL included the server's address, name and path of the script and all required parameters.
The resulting link, however, also contains the current session Id. It naturally changes with every call. Actually, this should not be a problem, but unfortunately there is a weakness of some modern RSS reader products. For some (not all) of them are programmed to interpret the link of a RSS record as it's unique id. Even if explicitly a GUID is given, it is sometimes ignored, and the link is used anyway. For this reason, it may not change, because these programs otherwise would mix it up. That is the reason why the session Id necessarily has to be removed from the link and that is also the reason why the primary key of the item appears in the link. This is not a limitation of the framework, but an unpleasant feature of some RSS reader products. Unfortunately you will have to live with it for now.
Further details on the use of this class can be found in the API documentation for the classes "RSS" and "RSSitem".
The following extract of the source code, shows the action in context:
<?php
/* get entries from database */
$query = array(
    'key' => 'blog.*',
    'order_by' => 'blog_created',
    'desc' => true,
    'limit' => 10
);
$rows = $this->database->get($query);
$rss = new RSS();
$rss->title = 'Blog';
$rss->description = 'the 10 most recent blog entries';
foreach ($rows as $row)
{
    $item = new RSSitem();
    // Title
    $item->title = $row['BLOG_TITLE'];
    // Link
    $action = 'blog_read_read_blog';
    $blog_id = $row['BLOG_ID'];
    $link = DisplayUtility::url("action=$action&blog_id=$blog_id", true);
    $link = str_replace(session_name() . '=' . session_id(), '', $link);
    $item->link = $link;
    // Text
    $item->description = $row['BLOG_TEXT'];
    // Date
    $item->pubDate = date('r', $row['BLOG_CREATED']);
    // add item
    $rss->addItem($item);
} /* end foreach */
print utf8_encode($rss->toString());
exit(0);
?>
How you could see from the above source code, each entry refers to the action "blog_read_read_blog" with the parameter "blog_id". Up to now this action does not possess this parameter. The following section will demonstrate, how to add this parameter to this action.
Search in the document for the action "blog_read_read_blog". It should currently contain the following source code:
<?php
/**
 * blog_read_read_blog
 *
 * returns bool(true) on success and bool(false) on error
 *
 * Type:        read
 * Permission:  0
 * Templates:   BLOG_READ_BLOG
 *
 * @access  public
 * @return  bool
 * @name    plugin_blog::blog_read_read_blog()
 * @param   array  $ARGS  array of params passed to the function
 */
function blog_read_read_blog ($ARGS)
{
    /* check input data */
    assert('is_array($ARGS);');
    settype($ARGS, 'array');

    /* global variables */
    global $YANA;

    /* do something */
    return true;
}
?>
First, you should check whether the parameter "blog_id" is set, as this is not always the case. Since the column "blog_id" in table "blog" is of type "integer", you should also check, if the input value is numeric. Next you should "cast" the type of the input value to an integer value. The following source code demonstrates this.
<?php
if (isset($ARGS['blog_id']) && is_numeric($ARGS['blog_id'])) {
    $id = (int) $ARGS['blog_id'];
}
?>
At this point, you should remember ( see above ) that you edited the function "create" in the template file and set the parameter "where" to the variable "$WHERE". Because you have done that, you can now set the variable "$WHERE" in the plug-in to influence this parameter.
To set the value of a template var call the function Yana::setVar. Set the value of this variable to "blog_id=$id".
<?php
if (isset($ARGS['blog_id']) && is_numeric($ARGS['blog_id'])) {
    $id = (int) $ARGS['blog_id'];
    $YANA->setVar('WHERE', "blog_id=$id");
}
?>
Finally, another feature is to be demonstrated. If a RSS feed is present, the framework will automatically create a graphics labeled "RSS" plus a link to the RSS feed of the application. To activate this feature all you need to do is set a variable. The name of this variable is "RSS_ACTION" and its value should be the name of the operation, which outputs the RSS feed. In this case "blog_rss".
The following figure shows how this symbol is displayed in a browser.
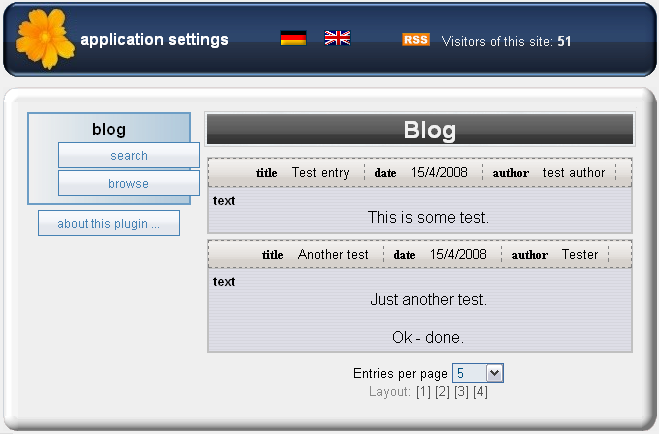
Figure: Presentation in a browser (Firefox 2.0)
The following extract of the source code, shows the action in context:
<?php
/**
 * blog_read_read_blog
 *
 * returns bool(true) on success and bool(false) on error
 *
 * Type:        read
 * Permission:  0
 * Templates:   BLOG_READ_BLOG
 *
 * @access  public
 * @return  bool
 * @name    plugin_blog::blog_read_read_blog()
 * @param   array  $ARGS  array of params passed to the function
 */
function blog_read_read_blog ($ARGS)
{
    /* check input data */
    assert('is_array($ARGS);');
    settype($ARGS, 'array');

    /* global variables */
    global $YANA;
    $YANA->setVar('RSS_ACTION', 'blog_rss');
    if (isset($ARGS['blog_id']) && is_numeric($ARGS['blog_id'])) {
        $id = (int) $ARGS['blog_id'];
        $YANA->setVar('WHERE', 'blog_id=' . $id);
    }
    return true;
}
?>
Compare your results with the source code above.
This step concludes the successful creation of your first own plug-in.
 Thomas Meyer, www.yanaframework.net
 Chapter 4: Editing templates and configuration files